How to Check Leveled Concrete for Cracks and Debonding
Posted By: Airlift Concrete Experts, 30 Oct 10:00 am Category:
UncategorizedA smooth-looking slab isn’t automatically ready for foot traffic or flooring. Self-leveling concrete is often walkable within 2-4 hours, while floor coverings can generally be installed after about 24 hours; timing varies with the product and environmental conditions. Knowing what to do after your concrete is leveled starts with checking for cracks, loose areas, and signs that the surface hasn’t cured enough for its next use.
It’s reasonable to want a clear sign that the work is sound before moving furniture back or scheduling flooring. This guide explains how to inspect the surface, spot possible cracking or debonding, and decide whether it’s ready for foot traffic or installation. You’ll also learn what changes to monitor and when a concern after concrete leveling calls for a closer professional assessment, so you can plan your next step with confidence.
Key Takeaways
- Use the leveling product’s cure guidance to decide when to allow foot traffic and when to plan flooring installation.
- Inspect the surface for cracks, hollow-sounding areas, or edges that appear to lift, and note whether any signs are changing.
- Before covering the slab, check that it is clean, sound, and suitable for the flooring material you plan to install.
- If unevenness or signs of debonding remain, identify the affected area and consider whether concrete leveling or raising could address the underlying issue.
Walkability and flooring installation timing
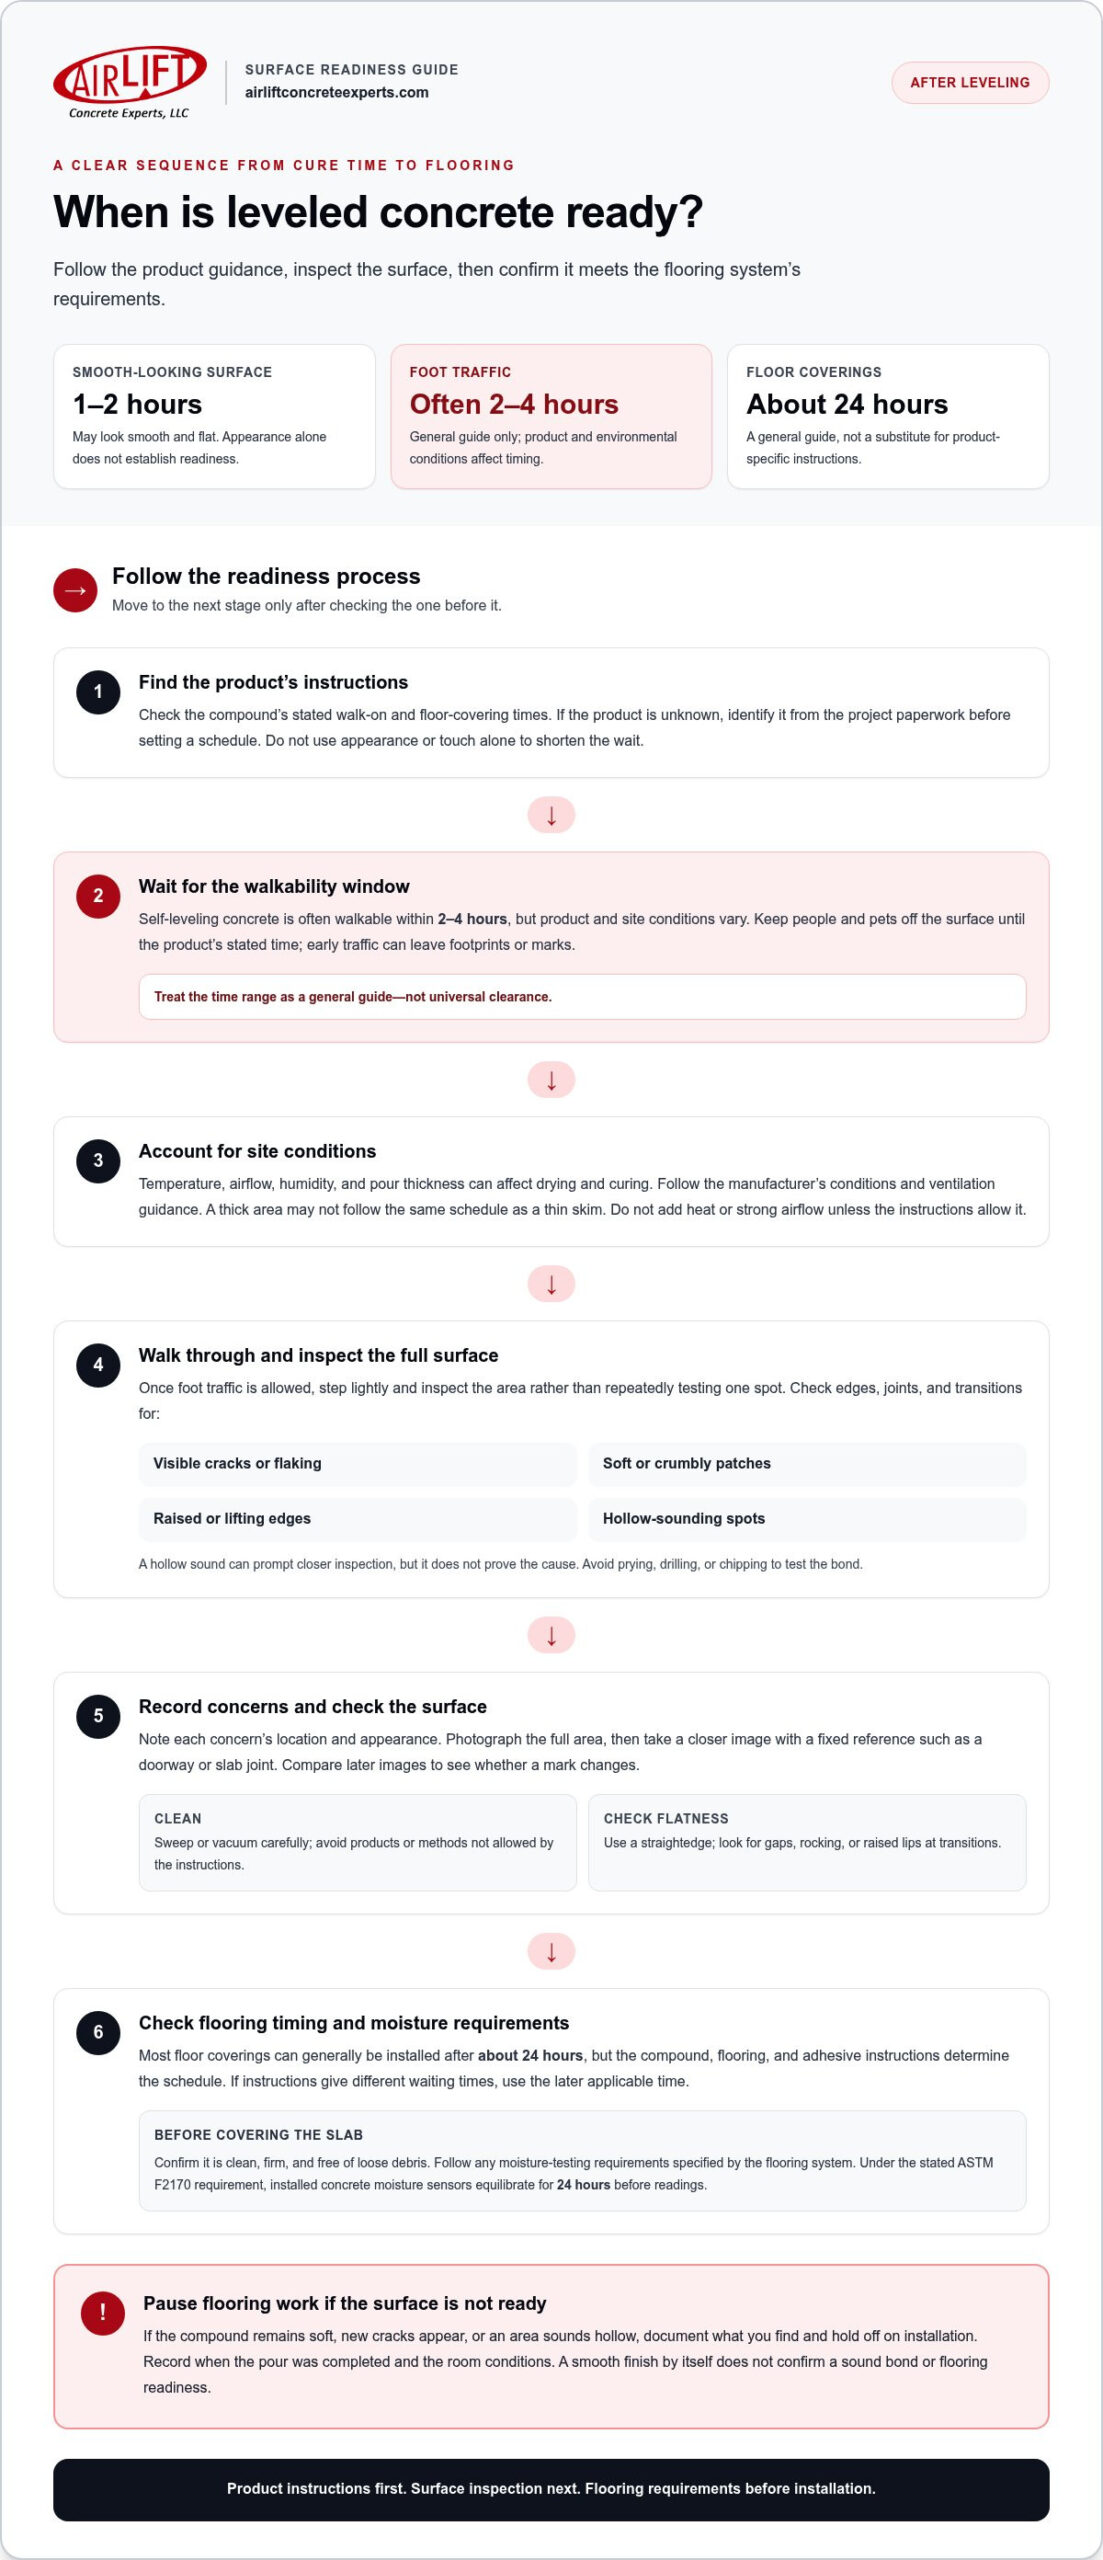
- Start with the product instructions, not the surface’s appearance. Self-leveling concrete may look smooth and flat within 1-2 hours, but that doesn’t establish that it can support foot traffic or flooring. Find the product’s stated walk-on and floor-covering times, then follow those directions. If you don’t know which compound was used, identify it from the project paperwork before setting a schedule. Knowing what to do after your concrete is leveled starts with checking those product-specific requirements.
- Keep people and pets off the surface until its walkability window. Self-leveling concrete is often walkable within 2-4 hours, but timing varies by product and environmental conditions. Treat that range as a general guide, not universal clearance. For example, a room that feels warm may still have a surface that needs more curing time. Don’t use appearance or touch alone to shorten the product’s stated wait. Protecting the surface early helps avoid footprints or marks.
- Plan flooring installation separately from light foot traffic. Most floor coverings can generally be installed over self-leveling concrete after about 24 hours, but products differ. A surface that can tolerate careful walking may not be ready for adhesive, underlayment, or flooring loads. Check the compound’s flooring guidance and the flooring system’s requirements. If those instructions give different waiting times, use the later applicable time before scheduling installation.
- Account for site conditions before scheduling installers. Temperature, airflow, humidity, and pour thickness can affect drying and curing. Follow the compound manufacturer’s directions for acceptable conditions and ventilation. Don’t assume a thick area will dry on the same schedule as a thin skim. Avoid adding heat or directing strong airflow unless the product instructions allow it. Uneven drying can affect the surface and complicate later preparation.
- Once foot traffic is allowed, make a careful walk-through. Step lightly and inspect the entire area rather than repeatedly testing one spot. Look for visible cracks, soft or crumbly patches, ridges, and areas that seem separated from the substrate. A smooth finish alone doesn’t prove the layer has bonded properly. Note any concerns and their locations before covering the floor. This inspection helps you decide whether the surface is ready for its next use.
- Check readiness before bringing in flooring materials. Confirm that the surface is clean, firm, and free of loose debris. Compare its condition with the flooring and adhesive instructions, including any moisture-testing requirements they specify. Don’t install over a damp, dusty, or damaged patch just because 24 hours have passed. Part of what to do after your concrete is leveled is confirming that the surface meets the flooring system’s requirements.
- Keep your schedule flexible if the surface hasn’t met the product’s criteria. If the compound remains soft, develops new cracks, or has a hollow-sounding area, pause flooring work and document what you find. Record when the pour was completed and the room conditions. Photographs can help show whether a crack changes between inspections. If you’re deciding what to do after your concrete is leveled, following the manufacturer’s guidance is a sound next step.
What finishing steps come after leveling concrete?
- Inspect the full surface in good light before covering or using it. Check the edges, joints, and transitions where the leveled area meets existing concrete. Look for visible cracks, flaking, raised edges, or spots that appear detached. A hairline mark and a widening crack are different observations, so note each one’s location and appearance. This first inspection gives you a clear baseline for later checks.
- Document any changes with consistent photographs. Take a wide image showing where a crack is, then a closer image capturing its shape. Include a fixed reference, such as a doorway or slab joint, so you can find the same spot later. Record whether the mark appeared after leveling or was already present. Comparing images helps distinguish a stable surface mark from a problem that is visibly changing.
- Check for possible debonding without damaging the surface. Look for lifting edges, flaking material, or a visible gap where the new layer meets the surrounding slab. A hollow sound when lightly tapped can prompt closer inspection, but it doesn’t prove the cause. Avoid prying, drilling, or chipping to test the bond. Mark the spot and compare it with the surrounding surface and your photographs.
- Remove dust and loose debris with a method suitable for the surface and the next finish. Sweep or vacuum carefully, especially in corners and joints. Don’t grind, scrape, or apply a cleaner unless the leveling product and flooring instructions allow it. Leftover dust can interfere with an adhesive bond, while an unsuitable liquid treatment may leave residue. Keep the area protected from dirt during the remaining work.
- Check flatness and transitions before placing furniture or flooring. Lay a straightedge across the leveled area and note visible gaps or rocking, especially near doorways and adjoining rooms. The required tolerance depends on the flooring material and its installation instructions, so compare your observations with those requirements. A raised lip at a threshold can affect the finished floor even when the main slab looks even.
- Follow the flooring system’s moisture-testing instructions before installation. The required test depends on the covering, adhesive, and substrate. Under the stated ASTM F2170 requirement, installed concrete moisture sensors equilibrate for 24 hours before readings. Record the result and the test location, then compare it with the flooring manufacturer’s limits. A dry-looking surface doesn’t replace a required moisture test.
- Repair or prepare the surface only after identifying the issue. A small blemish, a crack, and a detached area call for different responses. Don’t cover a moving crack or loose section with patching material just to hide it. If the defect affects a joint or the slab’s edge, keep that area accessible for assessment. Matching the preparation method to the problem helps prevent a concealed defect beneath the finish.
- Keep a short record of the completed work and your observations. Save the leveling product details, installation instructions, photographs, moisture readings, and notes about cracks or hollow-sounding areas. This information gives a flooring installer or concrete specialist a useful account of the surface. If unevenness or suspected debonding persists, a concrete leveling assessment can help determine the next practical step.
Airlift Concrete Experts: Polyurethane Concrete Leveling
Airlift Concrete Experts can help when a slab remains uneven, cracked, or appears to have debonded after leveling. Its polyurethane concrete leveling and concrete raising services address sunken concrete, while interior floor leveling and commercial concrete lifting serve different property needs. If your inspection shows that the surface still needs professional attention, Airlift Concrete Experts serves properties in Malvern, Hot Springs, Little Rock, Cabot, Conway, Benton, Bryant, North Little Rock, Sherwood, Jacksonville, and Hot Springs Village.
Share what you’ve observed, such as where the slab dips, whether cracks have changed, and how the area is used. Those details help clarify the concrete concern and the relevant service. For persistent leveling problems, contact Airlift Concrete Experts or visit Airlift Concrete Experts online.
Plan the Next Step With Confidence
A careful inspection gives you a useful record of the surface, but it can’t always explain why a crack or uneven area appeared. If the slab still seems unstable or its condition is changing, have the concrete assessed before covering it or returning the area to regular use. This helps you plan repairs based on the slab’s condition, not appearance alone.
Knowing what to do after your concrete is leveled also means recognizing when a remaining concern calls for a different solution. Airlift Concrete Experts provides polyurethane concrete leveling, concrete raising, and commercial concrete lifting. Contact the team to discuss your concrete surface and determine the right next step.
Contact Airlift Concrete Experts today to discuss your concrete concern. A thoughtful next step can help you move forward with greater confidence.



 Call Now